Side Dishes
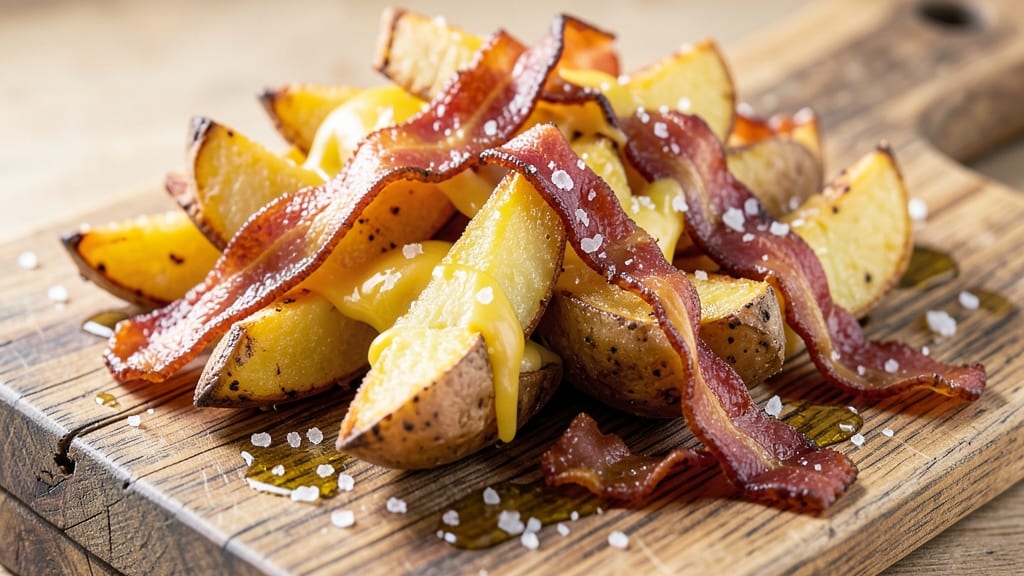
This bacon cheddar potato wedges recipe delivers the perfect balance of crispy, golden edges and gooey melted cheese—every bite is a satisfying crunch-meets-comfort-food experience. 🔥 The secret lies in baking the wedges until they're perfectly crispy before adding the cheese and bacon, ensuring that crispy texture stays intact while the cheddar turns creamy and the bacon adds a smoky, salty punch.
I've tested this recipe countless times, and it never fails to impress, whether you're serving them as a side dish or making them the star of the meal.
What sets these wedges apart is the combination of simple ingredients and a foolproof technique. You'll need just a few staples: russet potatoes, sharp cheddar cheese, crispy bacon, and a blend of spices like salt, pepper, and paprika to give them that irresistible flavor.
The wedges are baked at high heat to achieve that crispy exterior, then topped with melted cheese and crumbled bacon for a flavor explosion in every bite. It’s the kind of dish that’s easy to make but feels like a restaurant-quality treat.
The result is a dish that’s impossible to resist—crispy on the outside, creamy and cheesy on the inside, with every bite packed with smoky bacon flavor. These wedges are perfect for game day, family dinners, or as a side dish for grilled meats.
The crispy texture holds up even when topped with cheese, so you won’t end up with soggy wedges. Serve them with your favorite dipping sauce, like ranch or aioli, and get ready for rave reviews.
Whether you're a seasoned cook or just starting out, this recipe is designed to be simple yet impressive. With just a few steps and minimal prep time, you’ll have a crowd-pleasing side dish that’s sure to be a hit.
Let’s get started and make these crispy, cheesy, bacon-topped wedges that everyone will love!
Ingredients for bacon cheddar potato wedges
Crispy wedges, melty cheese, smoky bacon—just these 11 ingredients transform simple potatoes into crowd-pleasing magic.
| Ingredient | Amount | Notes |
|---|---|---|
| Russet Potatoes 🥔 | 2 lb | Cut into 2-inch wedges, skin on |
| Crispy Bacon 🥓 | 8 oz | Cooked and crumbled, thick-cut preferred |
| Sharp Cheddar Cheese 🧀 | 1 ½ cups | Shredded, aged variety for best flavor |
| All-Purpose Flour 🌾 | ½ cup | For light dusting, helps crispiness |
| Olive Oil 🫒 | 2 tbsp | Light variety for crispy coating |
| Salt 🧂 | 1 ½ tsp | Kosher salt for even seasoning |
| Black Pepper 🌶️ | ½ tsp | Freshly ground for best flavor |
| Smoked Paprika 🌶️ | ½ tsp | Adds subtle smoky depth |
| Garlic Powder 🧄 | ½ tsp | Enhances savory flavor |
| Butter 🧈 | 2 tbsp | Melted, for extra richness |
| Fresh Parsley 🌿 | 2 tbsp | Chopped, for garnish (optional) |
The potatoes are non-negotiable—russets have the right starch for crispy edges. Grab the biggest ones you can find (the 5 lb bags at Costco are perfect for game day). Cut them into even 2-inch wedges, skin on for texture. Thick-cut bacon is worth the splurge—it stays crispy longer and adds that perfect smoky crunch. I like Oscar Mayer Thick Cut because it cooks up fast and stays crispy when crumbled. The cheddar? Sharp, aged cheddar (like Cabot or White Cheddar) melts smoother and has more flavor than mild varieties.
No thick-cut bacon? Regular bacon works in a pinch, but it'll be softer. Short on sharp cheddar? Monterey Jack melts better if you're in a hurry, but it lacks that tangy punch. The smoked paprika adds depth—if you've got Penzeys or McCormick in your pantry, grab the smoked variety. No paprika? Extra pinch of cayenne (¼ tsp) gives a little kick. The flour is key—it helps the wedges crisp up instead of steaming. Lightly dust them before baking, but don't overdo it or they'll get gummy. And that melted butter? Don't skip it—it makes the wedges taste like they came from a diner.
These keep 3 days in the fridge, but honestly? They're best fresh. Reheat in the oven at 400°F for 5-10 minutes to restore crispiness. For make-ahead prep, bake the wedges without cheese or bacon, then store in an airtight container. Top with cheese and bacon right before serving—the texture stays perfect. Freeze uncooked wedges (tossed in oil) for up to 2 months. Pro tip: Double the batch—they disappear fast, and leftovers reheat beautifully.
Why You'll Love This Recipe
- One-Pan Magic: I swear by this—just potatoes, bacon, and cheese on a single sheet pan. No chopping boards, no messy bowls, just toss, bake, and boom. The only cleanup is wiping the pan while the oven’s still warm.
- Triple-Threat Crunch: That first bite? Crispy flour crust outside, creamy cheddar pull inside, and bacon bits that crumble like little salty surprises. It’s the kind of dish where every texture feels intentional—no sad, soggy wedges here.
- Game for Any Gathering: Between us, these wedges are my secret weapon for game nights, lazy Sundays, or when I need to feed a crowd without stress. Serve them as a side, a snack, or even a light dinner with a protein—no one judges (or cares).
- Budget-Friendly Leftovers: Honestly, I make a double batch on purpose. The leftovers reheat like a dream—crispy again if you broil them—and stretch my grocery budget. Plus, they’re the perfect lunchbox filler for my kid who “doesn’t like potatoes.” (Spoiler: she devours them.)
Step-by-step instructions for crispy bacon cheddar potato wedges
Here's how to create perfectly crispy wedges with melty cheese and smoky bacon—every bite delivers.
🍳 Step 1: Prep and Season the Potato Wedges
Start by cutting the 2 lb Russet Potatoes into 2-inch wedges, leaving the skin on. This size ensures they cook evenly without falling apart. Spread them out on a baking sheet and pat dry completely with paper towels—moisture is the enemy of crispy wedges.
In a large bowl, toss the potato wedges with 2 tbsp Olive Oil, 1.5 tsp Salt, 0.5 tsp Black Pepper, 0.5 tsp Smoked Paprika, and 0.5 tsp Garlic Powder. Make sure every wedge is evenly coated. I like to use my hands for this—it helps distribute the seasoning more thoroughly than a spoon.
🔥 Step 2: Parboil for Perfect Texture
Bring a large pot of water to a boil and add the seasoned potato wedges. Parboil for 5-6 minutes until they're slightly tender but still firm when pierced with a fork. This step ensures they cook through without turning mushy in the oven.
Drain the wedges well in a colander, then transfer them back to the baking sheet. Spread them out in a single layer, making sure they're not touching. This allows for maximum crispiness as they bake. Here's the thing—if you skip this step, your wedges will end up steamed instead of crispy.
🥘 Step 3: Bake Until Golden and Crispy
Preheat your oven to 425°F. Bake the potato wedges for 25-30 minutes, flipping them halfway through, until they're golden brown and crispy. You'll know they're ready when they sound crispy when you shake the tray and the edges are deeply browned.
While they bake, crumble the 8 oz Crispy Bacon into small pieces and set aside. This is where the magic happens—the crispy bacon adds that irresistible smoky, salty contrast to the creamy cheese. Don't skip this step; it's what makes these wedges special.
🍽️ Step 4: Add Cheese and Finish Baking
Remove the wedges from the oven and sprinkle the 1.5 cups Sharp Cheddar Cheese evenly over the top. Return them to the oven for 3-5 minutes just until the cheese begins to melt and bubble. Watch closely—you don't want it to burn, but you do want that perfect melty pull.
Drizzle the melted 2 tbsp Butter over the wedges and sprinkle with the crumbled bacon. The butter adds richness, while the bacon brings all the smoky goodness together. For that final touch, garnish with 2 tbsp chopped Fresh Parsley if you like—it adds a pop of color and freshness.
🔪 Step 5: Serve Immediately for Maximum Crunch
Transfer the wedges to a serving platter and serve them right away. The cheese should be gooey and stretchy, the wedges should be crispy on the outside and tender on the inside, and the bacon should be perfectly crumbled. If you let them sit too long, the crispiness will fade.
These wedges are perfect for game day, movie night, or as a side dish for any meal. The combination of crispy, cheesy, and smoky flavors is simply irresistible. Enjoy them while they're hot, and don't forget to save some for leftovers—they're even better the next day!
Pro Tips For Making Bacon Cheddar Potato Wedges
- Parboil First, Then Roast: Russets are starchy but dry out fast. Boil them whole for 8-10 minutes in salted water, then drain and rough up the skins with a fork—this guarantees crispy outs and fluffy ins. I learned this the hard way after serving sad, mealy wedges to a crowd.
- Use Crumbled Bacon: Skip the chopped bacon—crumble it first. It sticks better to the wedges, melts into the cheese more evenly, and you won’t lose that precious crispy texture when it gets soggy. Yes, it’s an extra 30 seconds, but your dish will taste like it came from a diner.
- Salt the Wedges Twice: Season the raw wedges before baking, then sprinkle more salt after they come out—once when they’re hot and again when they’re cool. The first layer seasons the flesh, the second locks in flavor. I used to skip this, and the wedges always tasted bland.
- Bake in Batches: Overcrowding the pan steams the wedges instead of crisping them. Work in two layers: bake half on the middle rack, flip, then add the second batch to the top rack. Your oven’s hot spots will do the work, and you’ll avoid soggy bottoms.
Regional styles of this dish
Southern Comfort Style
In the South, these wedges get a hearty twist with extra crispy bacon and a dash of cayenne for heat. I like to add ½ tsp cayenne pepper to the seasoning mix and top with extra-thick-cut bacon (like Applewood-smoked) for deeper flavor.
Serve with a side of creamy coleslaw and BBQ sauce for dipping—this combo is a Southern classic. 🌶️
Midwest Crispy Twist
The Midwest version focuses on achieving that perfect crispy texture by baking the wedges twice—first at 425°F for 25 minutes, then after adding cheese, at 375°F for 5 minutes. This two-stage bake keeps the wedges extra crispy while melting the cheese perfectly.
Top with crumbled blue cheese instead of cheddar for a tangy kick, and serve with ranch dressing. It’s a game-day favorite in Minnesota.
Northeast Pub-Inspired
For a Northeast pub-style version, swap the sharp cheddar for Parmigiano-Reggiano and add caramelized onions on top. I like to caramelize 1 cup thinly sliced yellow onions with 1 tbsp butter until golden, then sprinkle them over the wedges before adding the cheese.
Finish with crispy fried shallots for an extra touch of sophistication. This version pairs perfectly with a cold lager beer. 🍺
Southwest Spicy Kick
Give these wedges a Southwest flair by adding ½ tsp chili powder and ¼ tsp cumin to the seasoning mix. Top with crumbled cotija cheese and diced jalapeños for a spicy, tangy contrast.
I also like to add sour cream drizzle after baking for extra creaminess. Serve with salsa verde or guacamole for dipping—this version is a hit at Tex-Mex gatherings. 🌶️
Pacific Northwest Fresh Take
Up in the Pacific Northwest, these wedges get a lighter, fresher twist. Use blue cheese crumbles instead of cheddar and top with fresh arugula and balsamic glaze after baking. The arugula adds a peppery bite that balances the richness, while the glaze brings a touch of sweetness.
Serve with artisanal sourdough bread for dipping—this version is perfect for casual brunches or summer BBQs. 🌿
Nutrition facts
Frequently asked questions
Can I use sweet potatoes instead of russet potatoes?
Sweet potatoes work but won't give the same crispy texture. Their higher moisture content makes them more likely to steam instead of crisp up. If you must use them, pat them extremely dry and bake at 450°F for 10-15 minutes longer than russets to compensate. For best results, stick with russets—they're the gold standard for crispy wedges.
How do I keep the wedges crispy after adding cheese?
Timing is everything! Return the cheese-topped wedges to the oven for just 3-5 minutes at 425°F—no more. The cheese should be melted but not browned. Serve immediately on a wire rack (not a plate) to prevent sogginess. If reheating leftovers, bake at 400°F for 5-10 minutes to restore crispiness.
What's the best way to make these in an air fryer?
Air fryers work beautifully! Toss the parboiled wedges with oil and seasoning, then air fry at 400°F for 12-15 minutes, shaking halfway. After they're crispy, sprinkle cheese and air fry for 2-3 minutes more just until melted. For extra crispiness, lightly dust with flour before air frying. Watch closely—they burn faster in air fryers!
Can I make these ahead of time?
Bake the wedges without cheese or bacon, then store in an airtight container for 3 days. Reheat at 400°F for 5-10 minutes to restore crispiness, then top with cheese and bacon just before serving. For make-ahead prep, you can even freeze uncooked wedges (tossed in oil) for up to 2 months—just add 5-10 minutes to baking time when ready to cook.
What's the secret to extra crispy wedges?
Three key steps:
- Parboiling (removes excess starch),
- Pat them bone-dry (no moisture = crispiness), and
- High heat baking (425°F+). Also, spread them in a single layer with space between wedges so air circulates. Pro tip: Toss with a little flour before baking—it creates a light crust that enhances crispiness.